 Python: Deploy to production
How to deploy your Python code to production in just a few minutes
👋 Welcome to the Stackhero documentation!
Stackhero offers a ready-to-use Python cloud solution that provides a host of benefits, including:
- Deploy your application in seconds with a simple
git push.- Use your own domain name and benefit from the automatic configuration of HTTPS certificates for enhanced security.
- Enjoy peace of mind with automatic backups, one-click updates, and straightforward, transparent, and predictable pricing.
- Get optimal performance and robust security thanks to a private and dedicated VM.
Save time and simplify your life: it only takes 5 minutes to try Stackhero's Python cloud hosting solution!
Stackhero's Python cloud hosting service provides a simple and reliable way to deploy your Python projects to production in only a few minutes. Thanks to its intuitive setup and robust features, you can focus on developing your application while Stackhero manages the infrastructure side.
Key features include:
- Deployment with a straightforward
git push - Custom domains with automatic TLS certificate management (HTTPS)
- Dedicated, private VMs for enhanced security and confidentiality
- Support for HTTP/2, TLS 1.3 (HTTPS), WebSockets, GZIP & Brotli compression, ETag, and TCP/UDP port access
Prerequisites
Before you get started with Stackhero, please ensure that Git is installed on your computer.
If your development environment is not yet set up, or if you want to save time on configuration, you may want to try Stackhero's Code-Hero.
Code-Hero is a ready-to-use, easy-to-use development platform that runs directly in your browser, on any computer, tablet, or phone. Based on a VSCode fork, Code-Hero comes with all the essential development tools pre-installed, so you can start coding straight away without any extra setup.
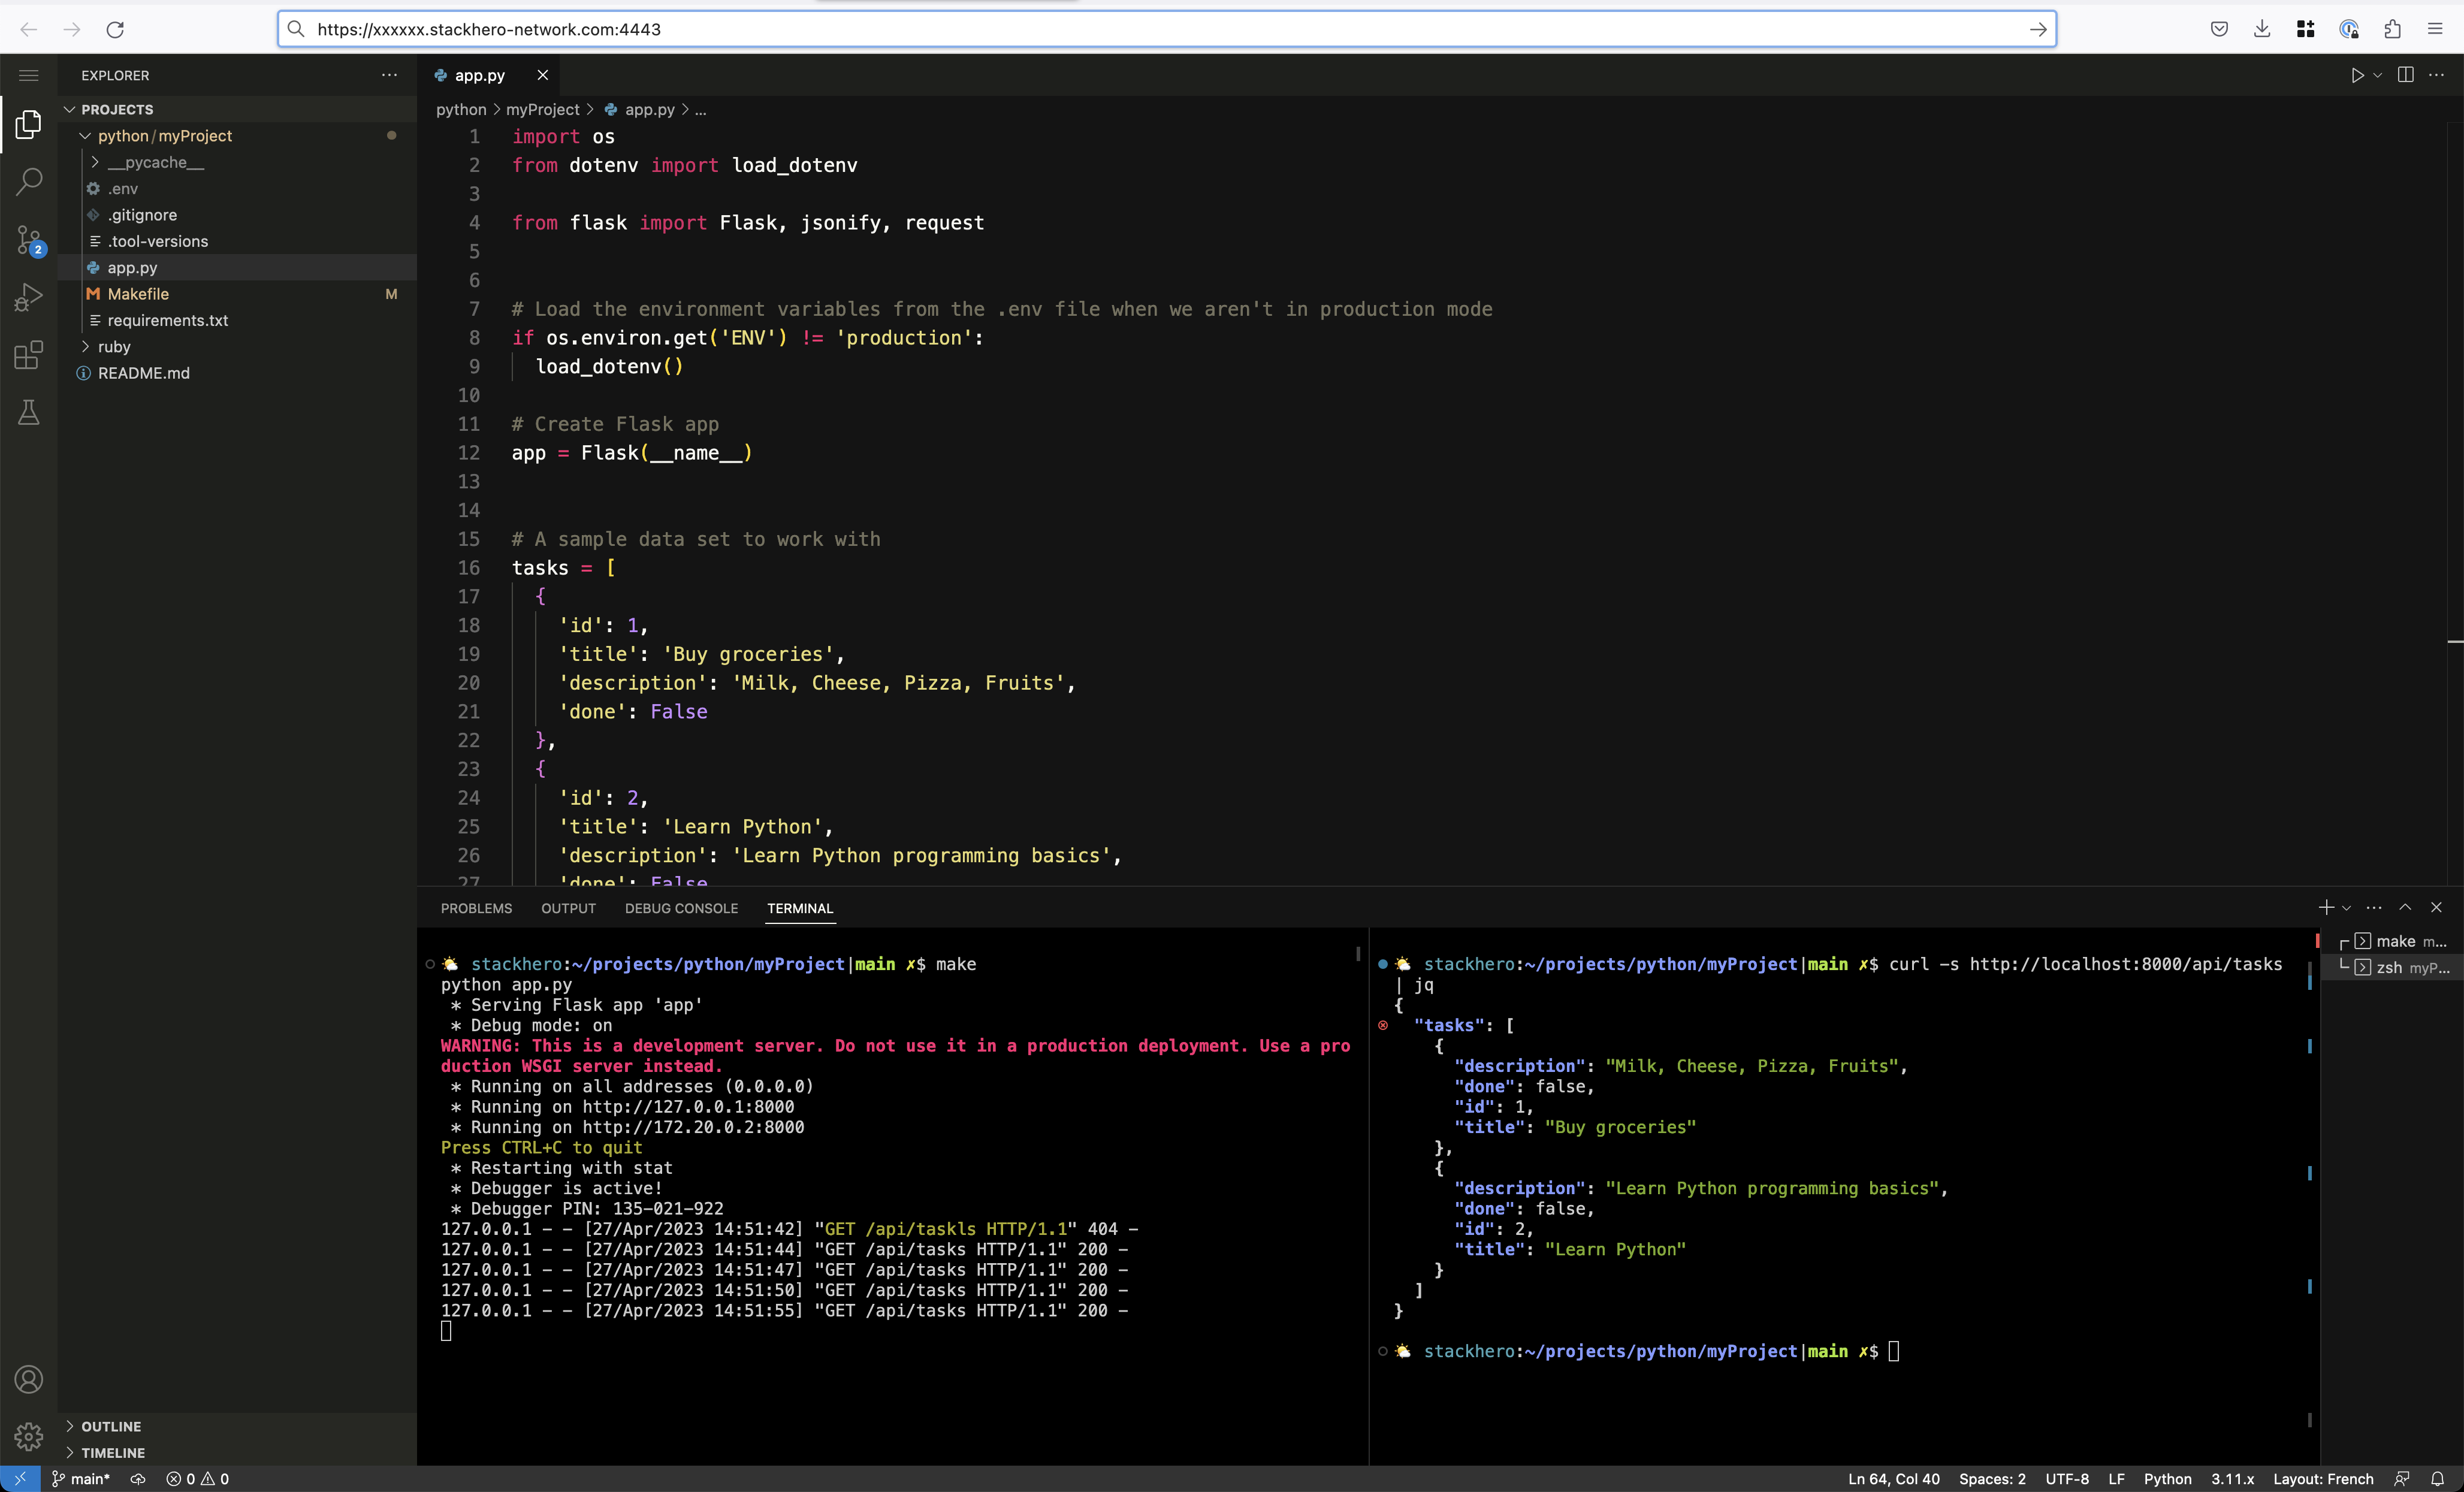 Example of a Code-Hero instance running directly in the browser
Steps to deploy to Stackhero
Deploying your Python application to Stackhero is designed to be simple and seamless. Here’s how to proceed:
- Create a Python service on Stackhero.
- Add your SSH public key to your Python service configuration.
- Configure the
git pushcommand on your development platform. - Add a Makefile to your project.
- Deploy your code to production.
If you encounter any issues during deployment, you will likely find answers in the "Troubleshooting" documentation. Checking there first can save you a lot of frustration.
Configuring your "Stackhero for Python" service
If you have not yet started a Stackhero for Python service, you can create one from your Stackhero dashboard. This usually only takes a few minutes.
Once your Python service is up and running, you will need to add your SSH public key to its configuration. To display your public key, run:
cat ~/.ssh/id_*.pub
Do you not have SSH keys yet?
You can generate them with:
ssh-keygen -t ed25519
To add your public key to your Python service:
- Open the Stackhero dashboard and select your Python service.
- Click the "Configure" button.
- Paste your SSH public key into the "SSH public keys" section.
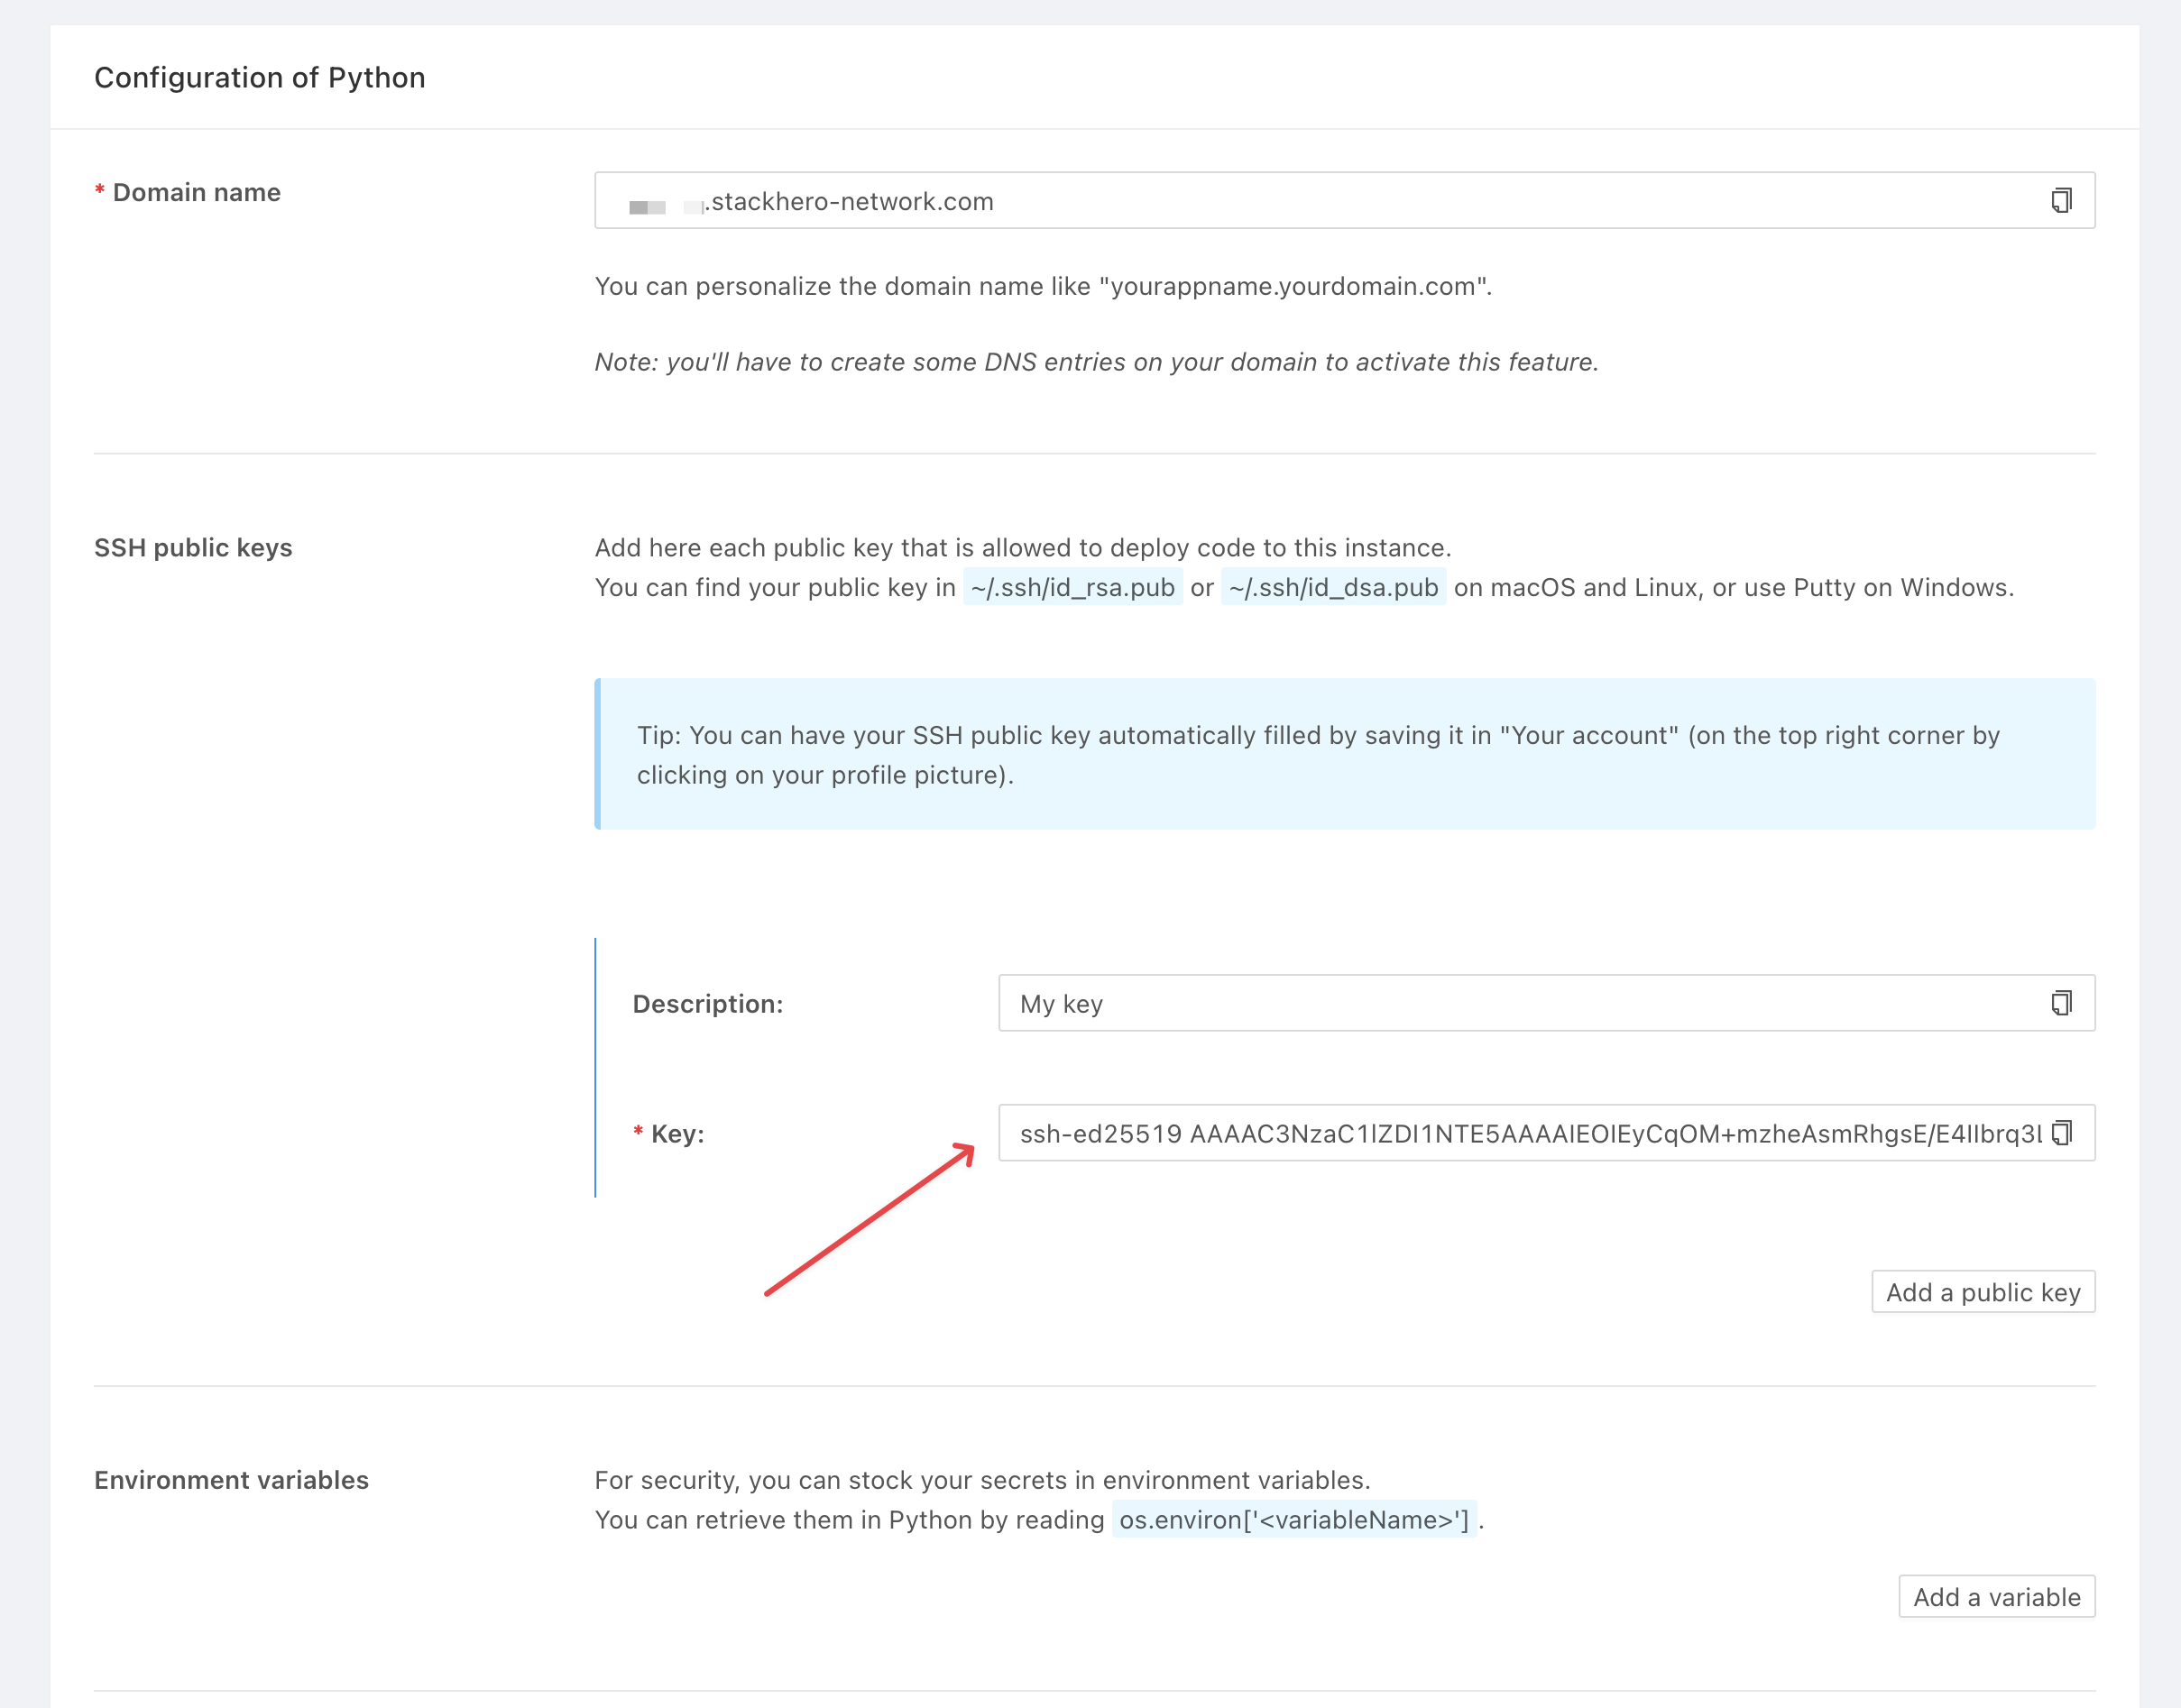 Example of a Python service configuration
Tip: You can also set your SSH public key globally so that any new services you create will automatically include it. To do this, go to your profile in the Stackhero dashboard, click your profile picture in the top right corner, select "Your profile", and add your SSH public key.
Configuring the git push command for deployment
Stackhero makes deployment easy by using the Git CLI and the familiar git push command. There’s no need to install additional software—just configure your Git remote once and you’re ready to go.
You’ll find your git remote command on the main page of your service in the Stackhero dashboard. It will look like this:
git remote add stackhero ssh://stackhero@<XXXXXX>.stackhero-network.com:222/project.git
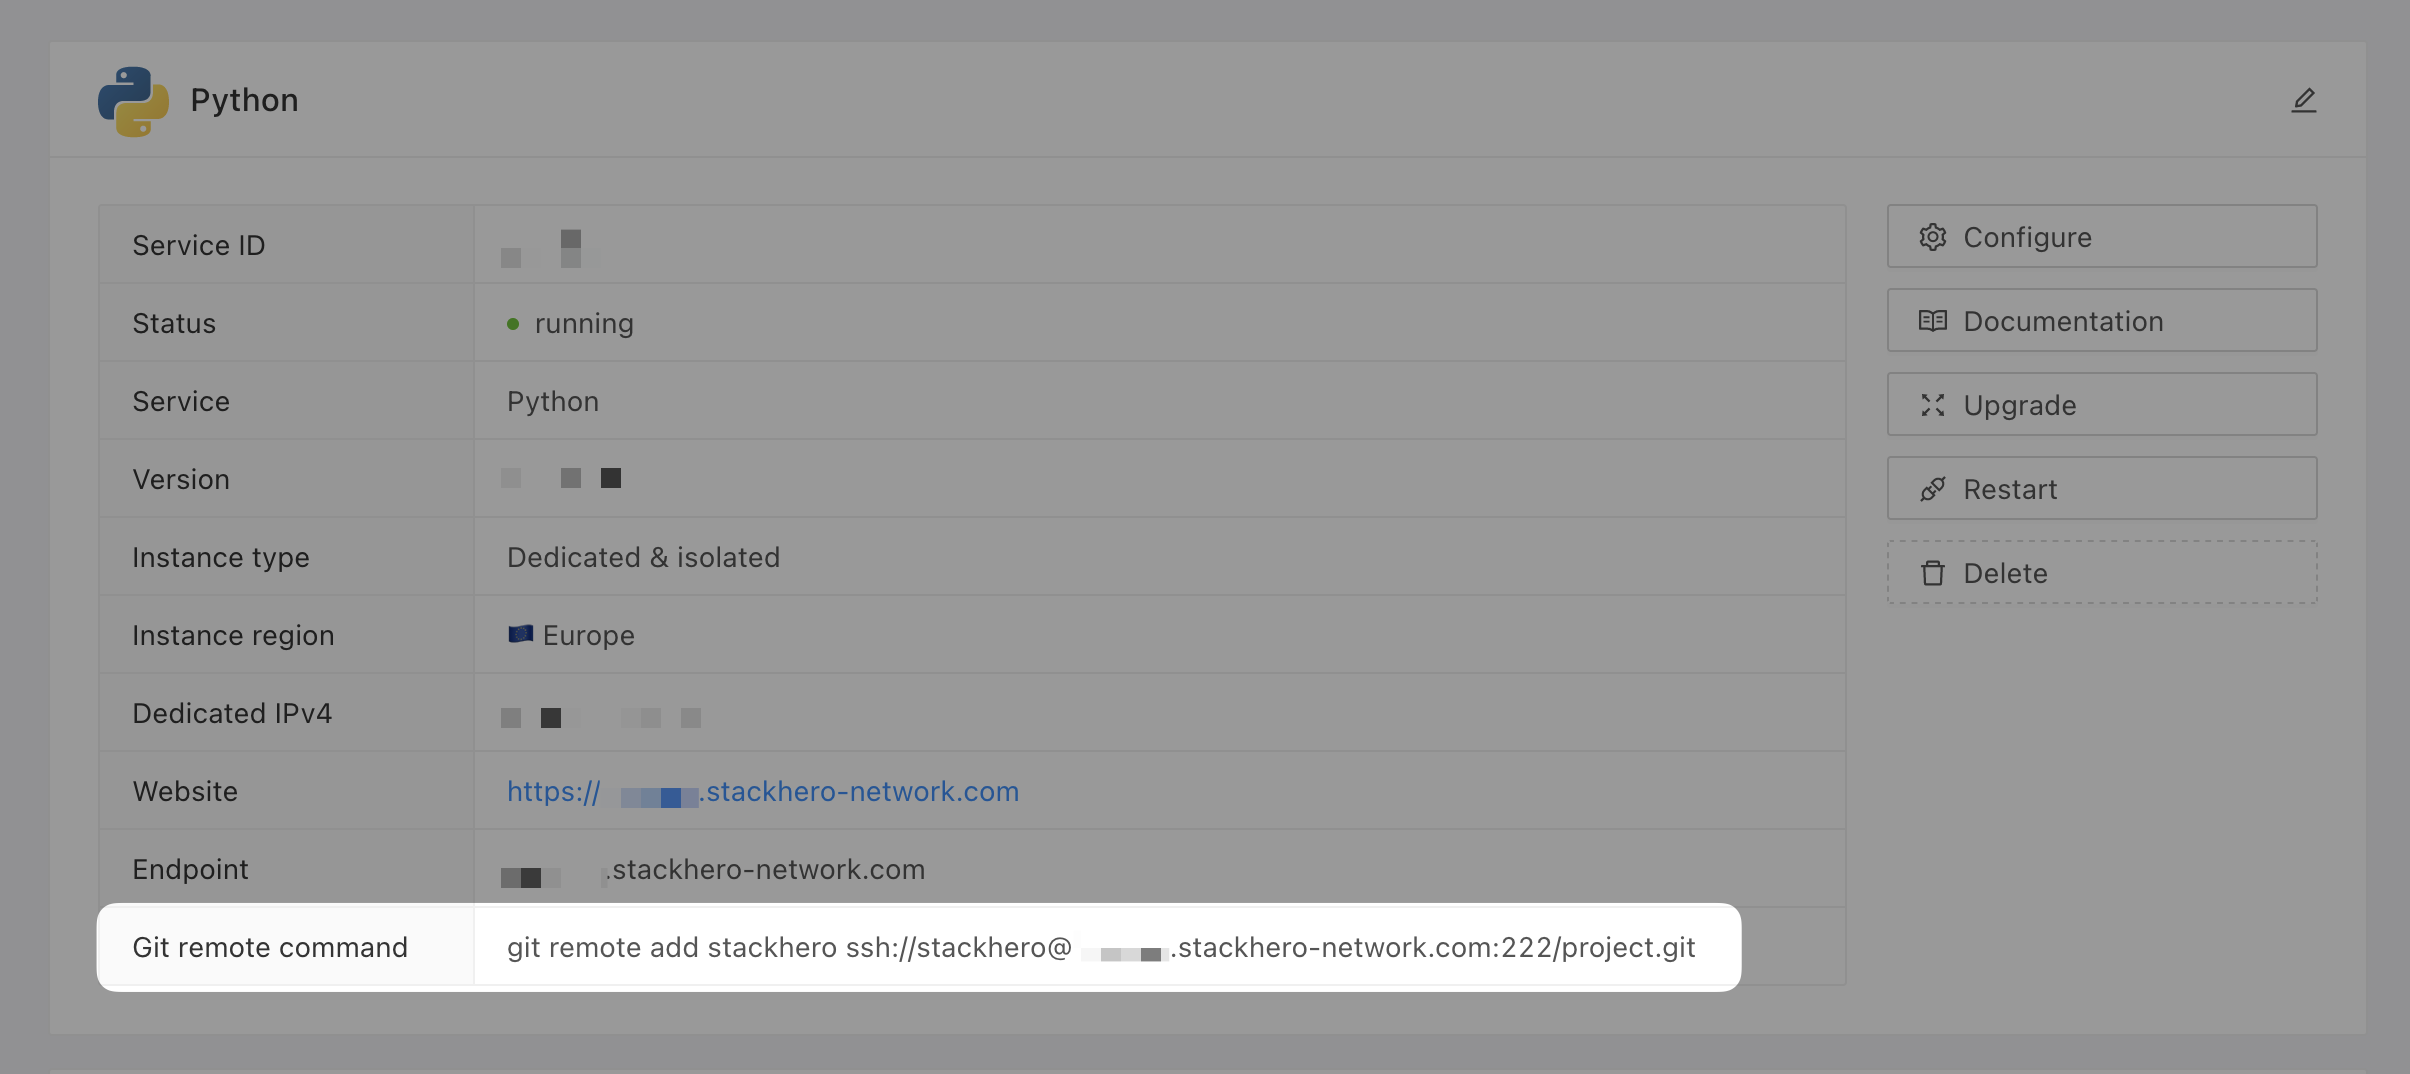 Python Git remote command on Stackhero's dashboard
Creating a Makefile for Stackhero deployment
To tell Stackhero how to run your application, you’ll use a Makefile at the root of your project.
If you’re new to
Makefilefiles and themakecommand, don’t worry. Just follow these instructions to get started.
Create a Makefile at the root of your project with the following content:
run:
	gunicorn app:app -b 0.0.0.0:8080 --error-logfile -
A few important points about this Makefile:
- The
runrule is required, as Stackhero executes it automatically. Please do not rename it. - The command
gunicorn app:app -b 0.0.0.0:8080 --error-logfile -is just an example. Adjust it to suit your application’s requirements. - Make sure to start the gunicorn command with a tab character. If you see an error like "*** missing separator", it means the tab is missing.
In this example, Gunicorn is used to serve your application (make sure it is listed in your requirements.txt). The argument -b 0.0.0.0:8080 means it listens on all interfaces on port 8080. If you choose a different port, remember to update your Python service configuration in the Stackhero dashboard. The app:app part refers to the app object inside your app.py file.
Deploying your Python application
Once everything is configured, you can deploy. From your project directory, use this command to push your code to Stackhero:
git push stackhero main
The first time you run this command, you’ll be asked to confirm the SSH key fingerprint. Simply answer "yes" when prompted. In a few seconds, your application will be online.
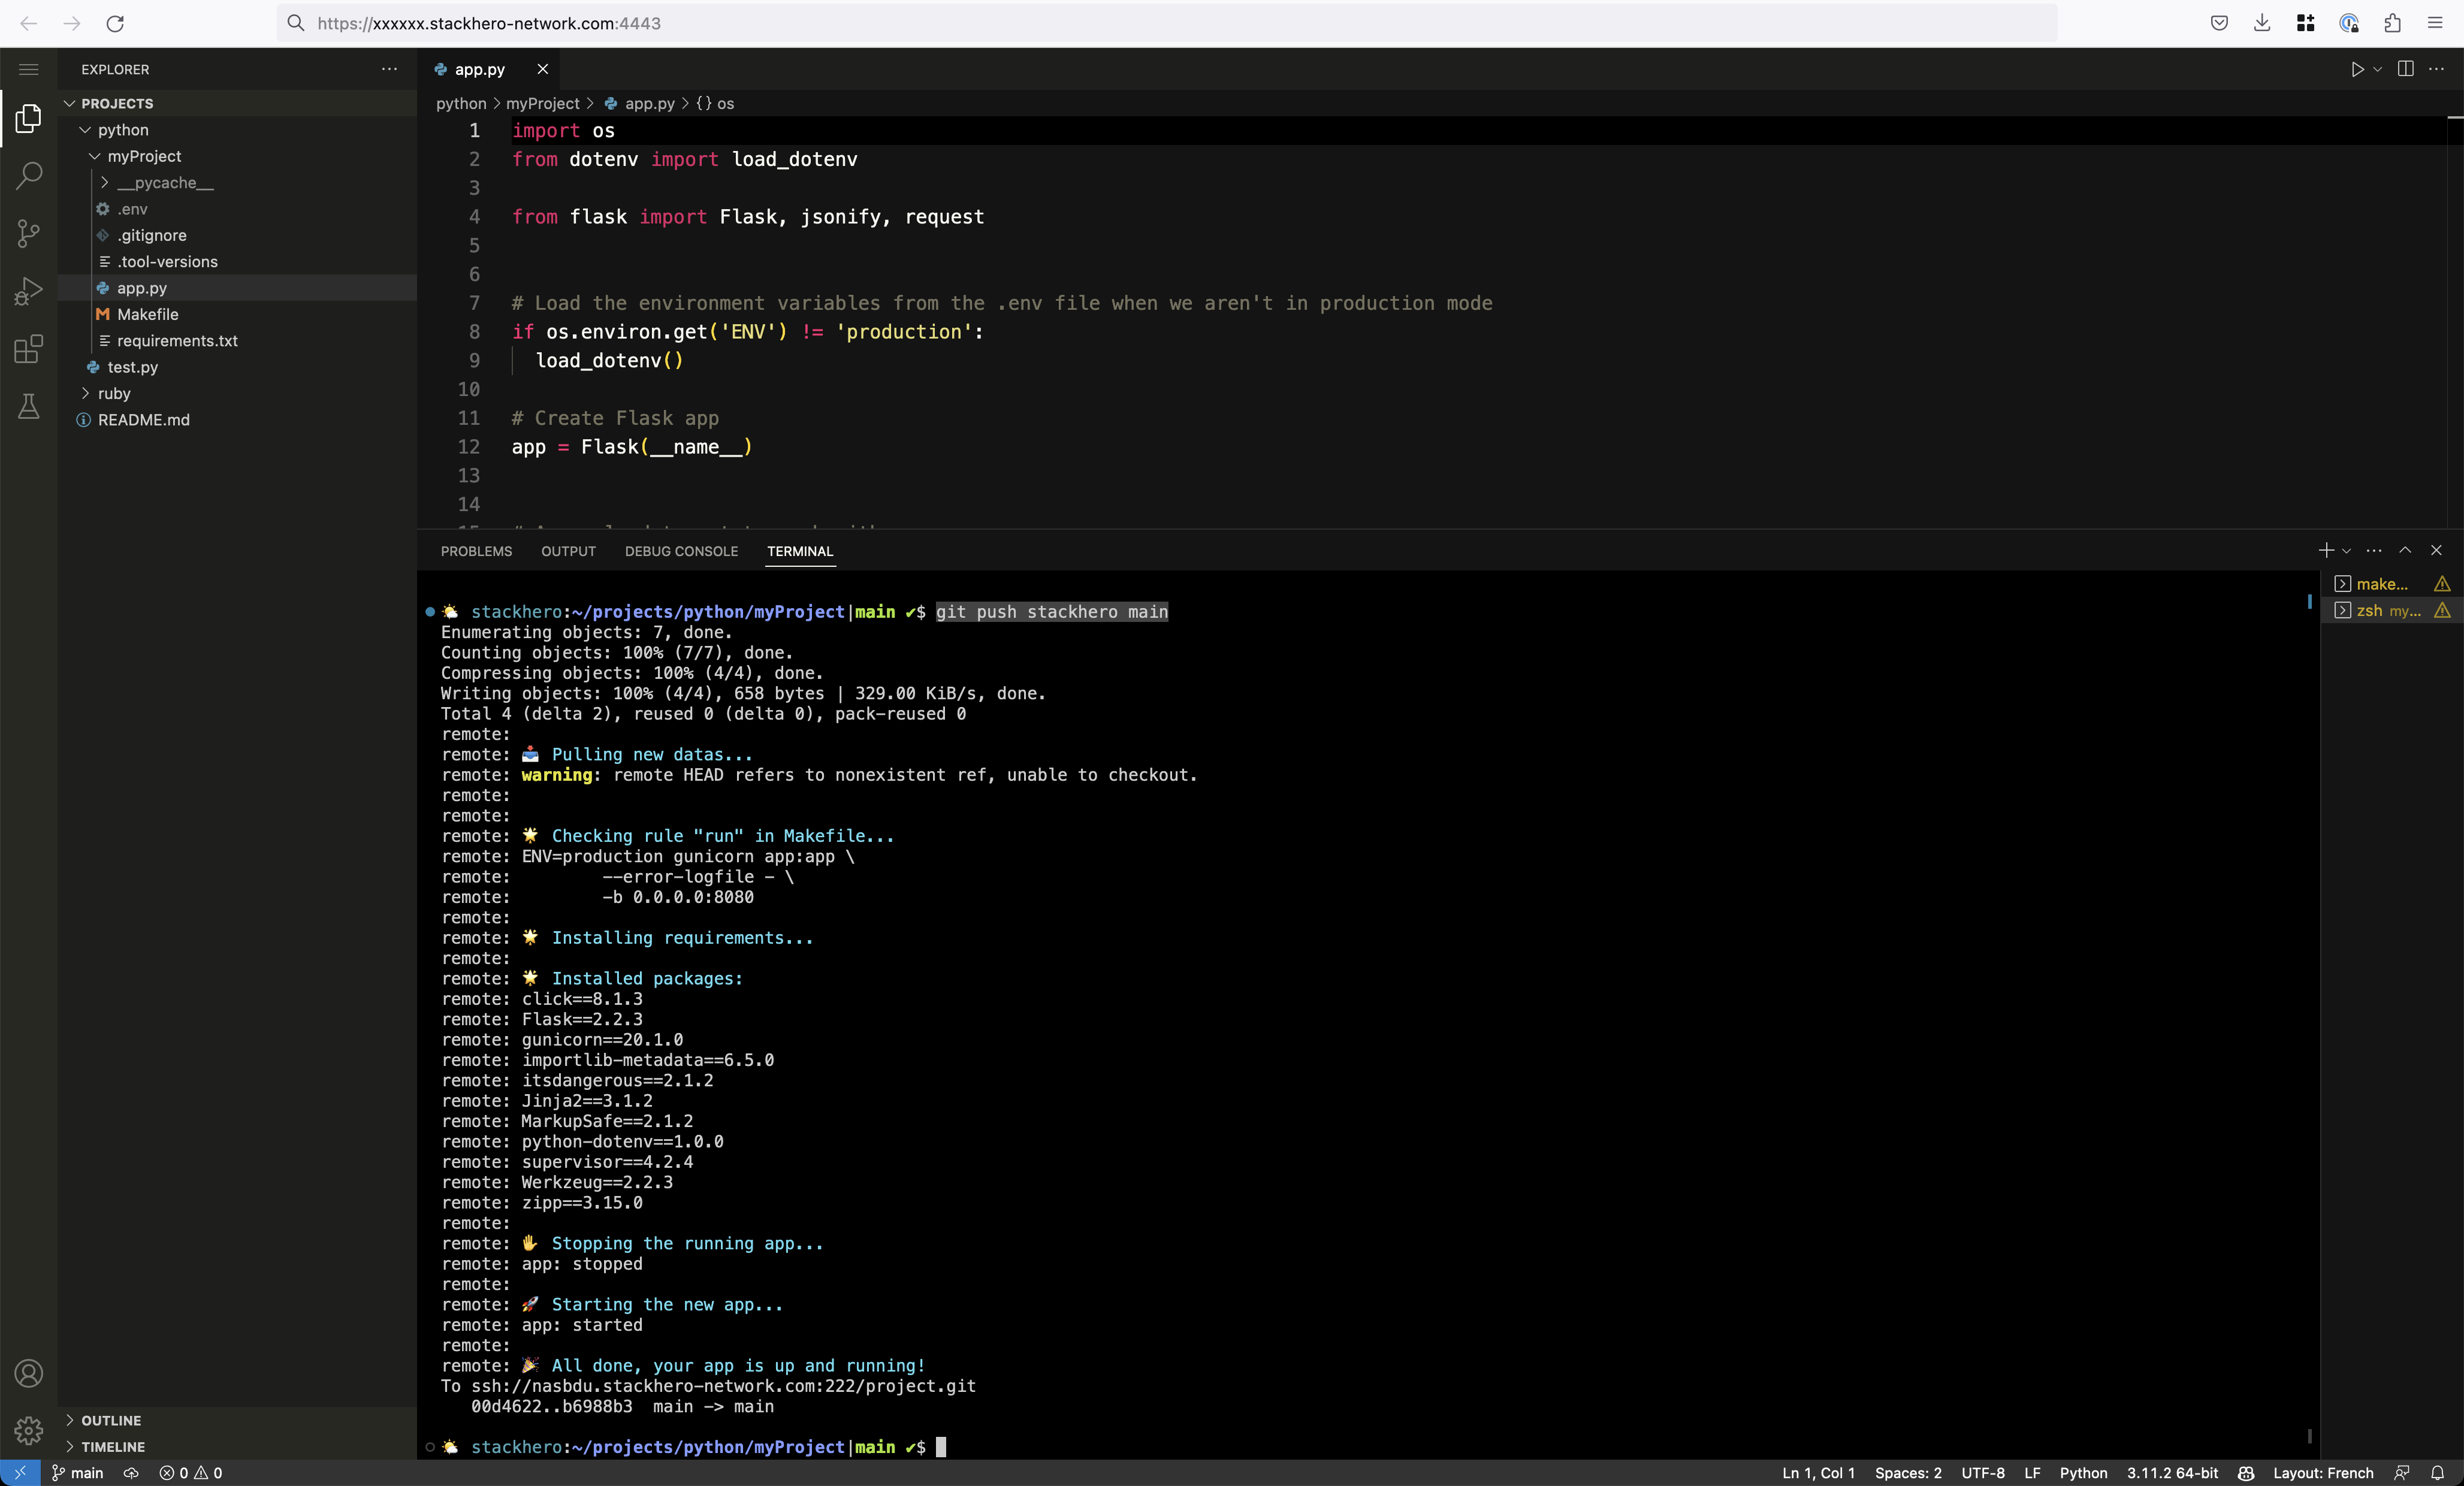 Example of deploying Python code to Stackhero using the git push command
To view your deployed application, go to the "website" URL shown in your Stackhero dashboard (it usually looks like https://<XXXXXX>.stackhero-network.com).
That’s it, your application is now live in production.
Are you experiencing any issues during deployment?
The Troubleshooting section is full of solutions to help you resolve problems quickly.
Conclusion
We hope this guide has helped make deploying your Python code to production on Stackhero clear and accessible. With these basics, you can confidently bring your projects online.
If you’d like to go further, the "Advanced Deployment Usages" documentation covers topics such as deploying from different git branches, tags, or commits, managing multiple environments (like staging and production), and using environment variables.
And remember, if you run into any issues, the "Troubleshooting" documentation is always available to help you get back on track quickly.