 Node-RED: Handle projects
How to use "Projects" in Node-RED
👋 Welcome to the Stackhero documentation!
Stackhero offers a ready-to-use Node-RED cloud solution that provides a host of benefits, including:
- MQTT server included (Mosquitto).
- Full access to Node-RED admin UI.
- Node-RED Dashboard included.
- Unlimited and dedicated SMTP email server included.
- Effortless updates with just a click.
- Customizable domain name secured with HTTPS (for example, https://node-red.your-company.com).
- Optimal performance and robust security powered by a private and dedicated VM.
Save time and simplify your life: it only takes 5 minutes to try Stackhero's Node-RED cloud hosting solution!
"Projects" in Node-RED is a powerful feature that brings Git-based version control directly into your workflow. By taking advantage of this functionality, you will find it much easier to manage and keep your flows in sync with external Git repositories, which is especially helpful for team collaboration and maintaining an organized development process.
Creating a public key
To get started, log in to your Node-RED instance. Click the "hamburger" menu icon in the top-left corner, go to "Projects", and select "New".
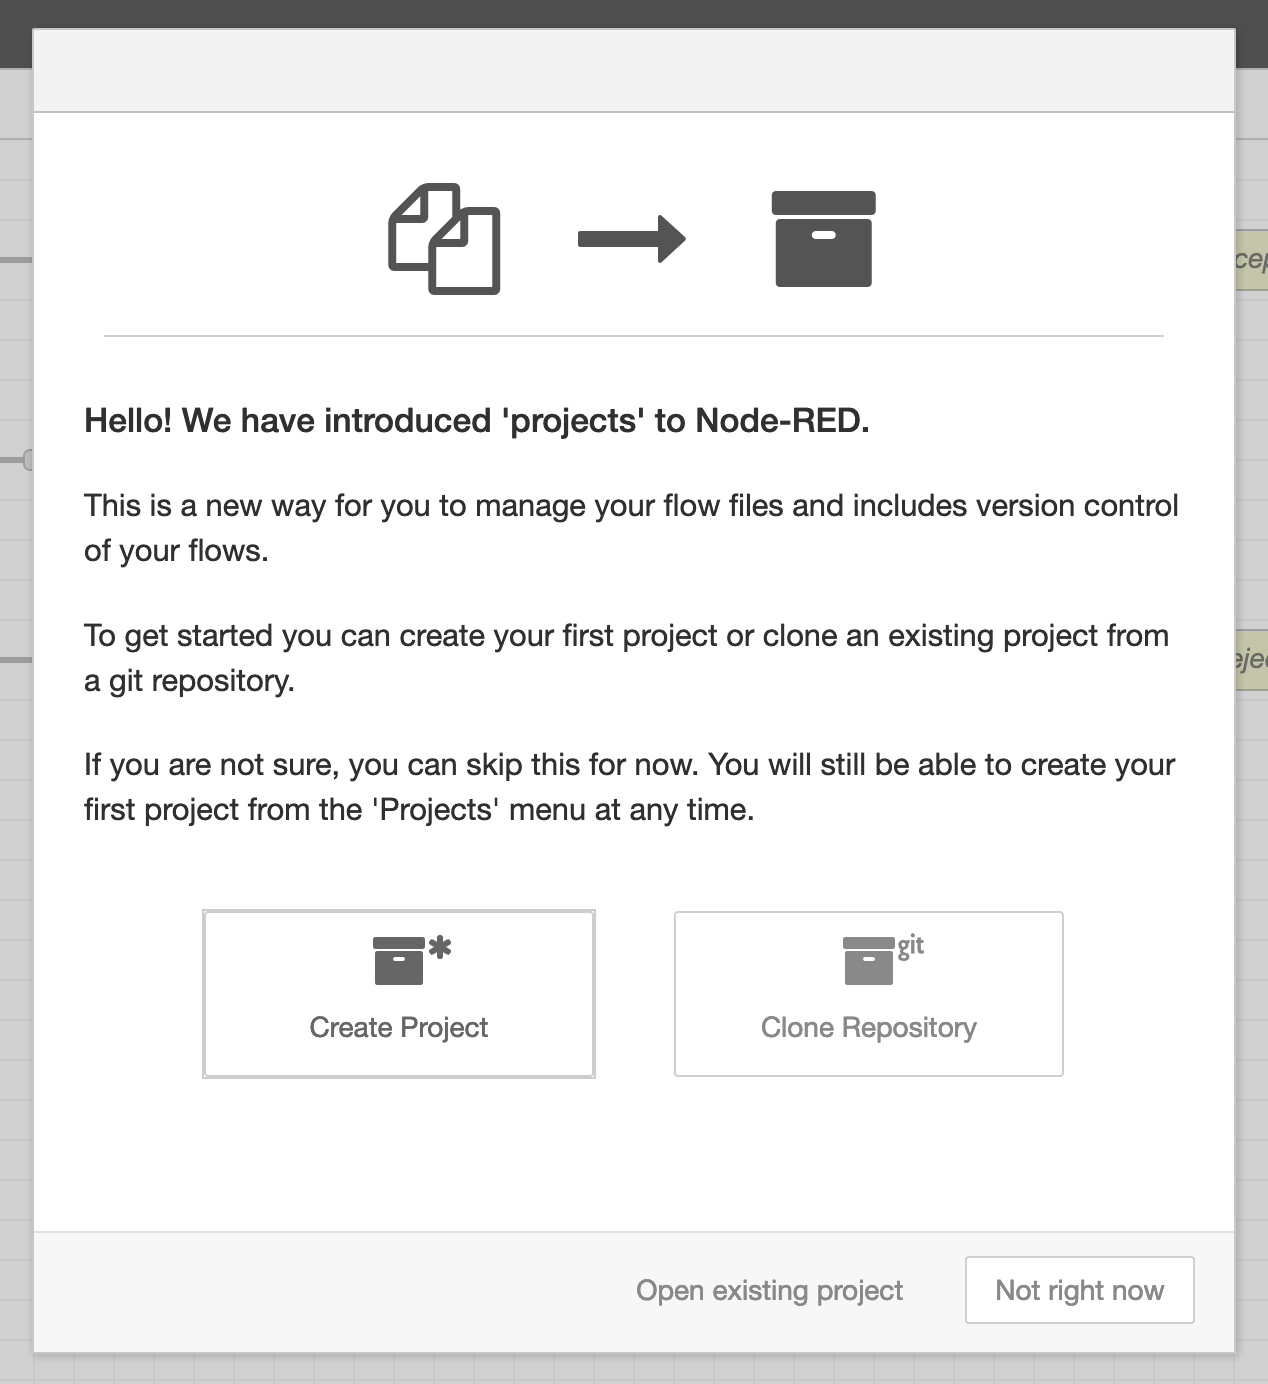 Welcome screen
Before you create or clone a project, you will need to generate a public key. Choose the Not right now option if prompted. Next, open the menu (the "hamburger" button in the top-right corner), navigate to Settings, and then head to the Git config section.
In the "Committer Details" area, enter your Git username and email address. These details help link your Git commits to your identity. For consistency, you might prefer setting the username as Node-RED and using an email like nodered@<XXXXXX>.stackhero-network.com.
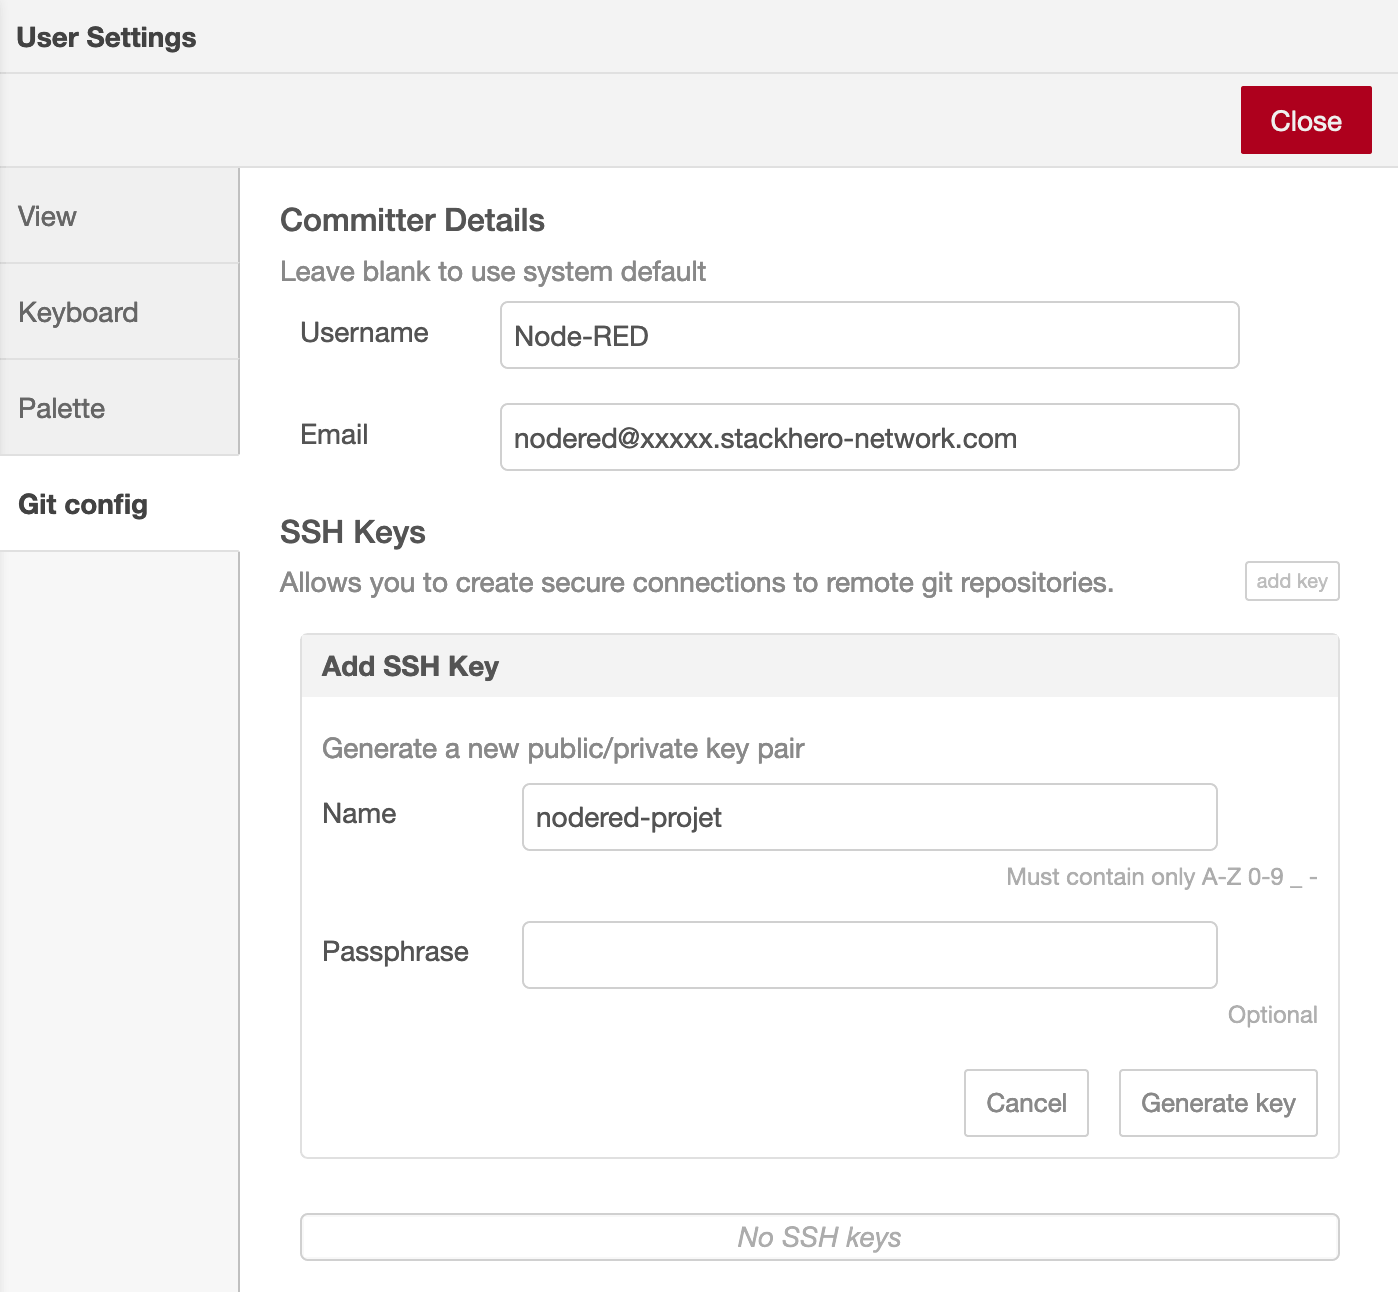 Git configuration panel
Once you are ready, click the Add key button, give your key a descriptive name, and then click Generate key. You can then use the Copy public key to clipboard option to copy the key before closing the panel.
Configuring your remote repository
To connect Node-RED to a remote repository, you will want to follow these steps (the example here uses GitHub, but the process is similar for other platforms):
- Add your public key to your chosen platform's settings.
- Get the SSH URL for your Git repository.
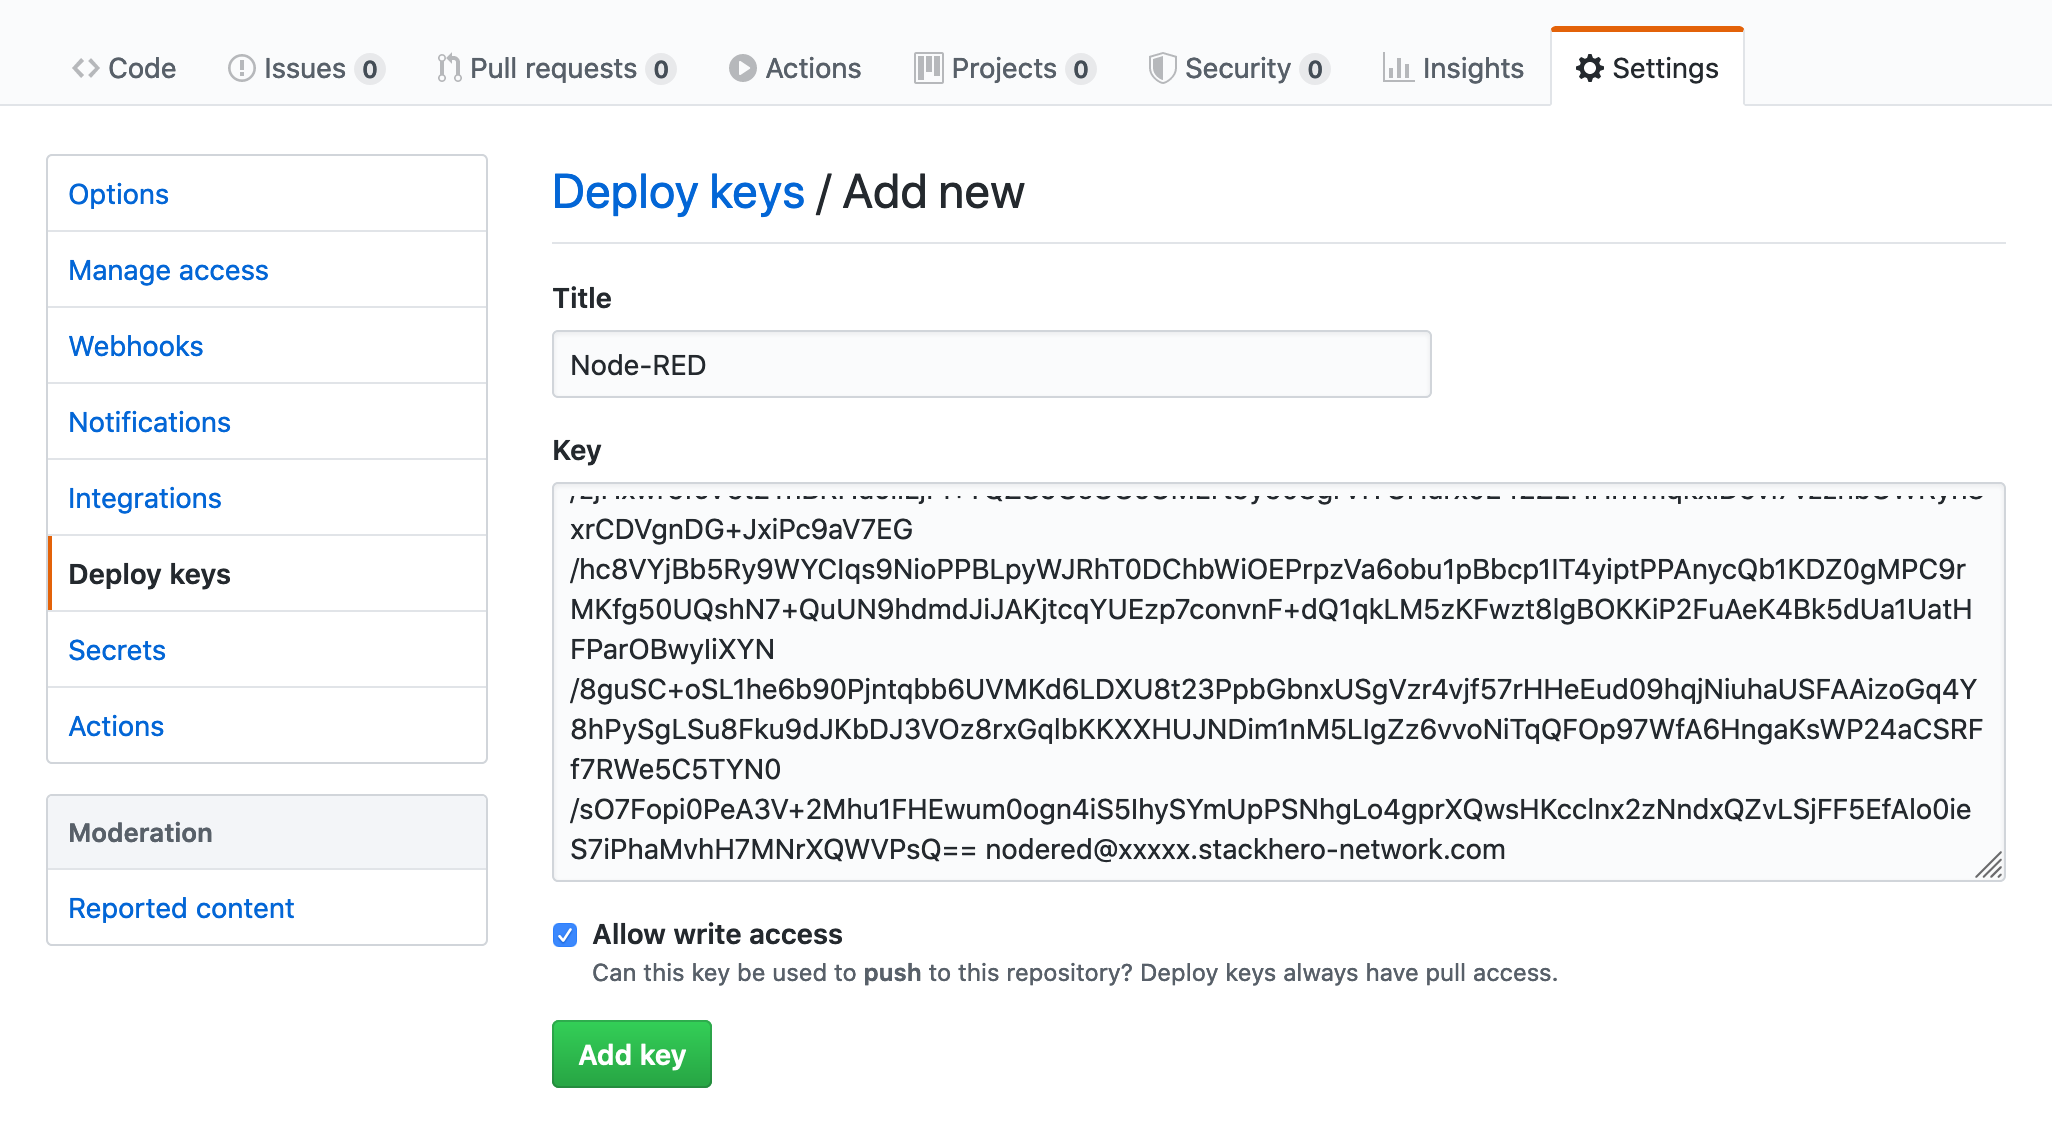
You can either create a new repository or use an existing one. On GitHub, open your repository, go to Settings, then Deploy keys, and click Add deploy key. Paste in the public key you copied earlier, give it a clear name like "Node-RED", check the Allow write access box, and click Add key.
 Add public key on GitHub
Head back to your repository's Code tab and copy the SSH URL. This will usually look like [email protected]:<yourOrganization>/<yourRepositoryName>.git. If you are working with an existing repository, you will find this URL by clicking the Clone or download button.
Adding the remote repository to Node-RED
Switch back to Node-RED, open the menu (top-right hamburger icon), select Projects, and then click "New".
Choose Clone Repository and double-check your username and email settings. Paste the SSH URL of your repository into the Git repository URL field (for example, [email protected]:<yourOrganization>/<yourRepositoryName>.git) and click Clone Project.
If you are using a new repository, Node-RED might prompt you to create default project files. If so, you can select Create default project file.
Node-RED gives you the option to encrypt your flow credentials files before they are added to Git. Turning on encryption is strongly recommended, as it helps keep sensitive information safe. Make sure to store the encryption key in a secure place. You will need it if you ever want to decrypt your credentials.
When you are ready, click Create project files to finish setting up your project.
Additional resources
If you would like more in-depth information, the official Node-RED documentation on Projects is a helpful resource: Node-RED Projects Documentation.
You may also find this video tutorial helpful: Introduction to Node-RED Projects (YouTube).