 MongoDB: Replica set (HA)
How to configure a high availability replica set
A replica set is a group of MongoDB nodes that work together to provide high availability and improved performance by duplicating data across multiple servers. With a replica set, your database remains accessible even if one of the nodes fails, and you can handle more requests by distributing the workload.
 Example of a replica set with 3 nodes
In a high availability setup, if one node goes offline, your data is still available from the other nodes. Performance also gets a boost because all write operations go to the primary node, while read operations can be spread across the secondary nodes.
If you are new to replica sets, you might want to check out MongoDB's official documentation for more background.
How replica sets work
To set up a replica set, you will need at least three MongoDB nodes:
- One node serves as the primary, handling all write operations and, by default, read operations too.
- The other nodes are secondaries. They continuously replicate data from the primary almost in real time.
If a secondary node becomes unavailable, your application continues to operate normally. When the secondary rejoins the cluster, it synchronizes any data it missed and brings itself up to date with the rest of the replica set.
If the primary node fails, the replica set automatically triggers an election to select a new primary. This process usually takes about 10 seconds. During this time, the replica set is read-only. Once the new primary is elected, all operations resume as normal.
 Example of an election
Getting started with a MongoDB replica set
To create a replica set on Stackhero, you will need at least three MongoDB instances. Here is a step-by-step guide:
- Start your three (or more) MongoDB instances from the Stackhero dashboard.
- After your instances are running, update their configurations in the dashboard:
- Set the same admin password on every instance.
- Enable the Activate replica set option.
- Choose a replica name and a secret key that all nodes will share. (Keep in mind: The replica name cannot be changed after creation. If you are unsure,
rs-1is a good default.)
Remember that ALL your instances should have identical configurations (admin password, replica set name, and replica secret key).
Once your configuration is saved, you will need to define all members of your replica set within MongoDB. Here is how you can do that:
- You can use this command to connect with the Mongo CLI:
mongo --quiet mongodb://admin@<XXXXXX>.stackhero-network.com/?tls=true
If you do not have the Mongo CLI installed, you can use the official Docker image with this command:
> docker run -it mongo /bin/bash
This command opens a shell where you can run Mongo commands directly.
- After connecting, you can initiate your replica set with the following command. Be sure to replace the
_idwith your chosen replica set name and update the member hostnames as needed:
rs.initiate({
   _id: "rs-1",
   members: [
      { _id: 0, host: "<XXXXXX>.stackhero-network.com:27017" },
      { _id: 1, host: "<XXXXXX>.stackhero-network.com:27017" },
      { _id: 2, host: "<XXXXXX>.stackhero-network.com:27017" }
   ]
})
If the command is successful, you will see a response like { "ok" : 1 }.
- If you would like to review your replica set configuration, you can run:
rs.conf()
You only need to apply this configuration on one node. The other nodes are automatically updated.
Your MongoDB replica set should now be up and running.
Check your MongoDB replica set status
To help you monitor the status of your replica set, we have created a Node.js script that checks the status every second. You can find this script on our GitHub repository.
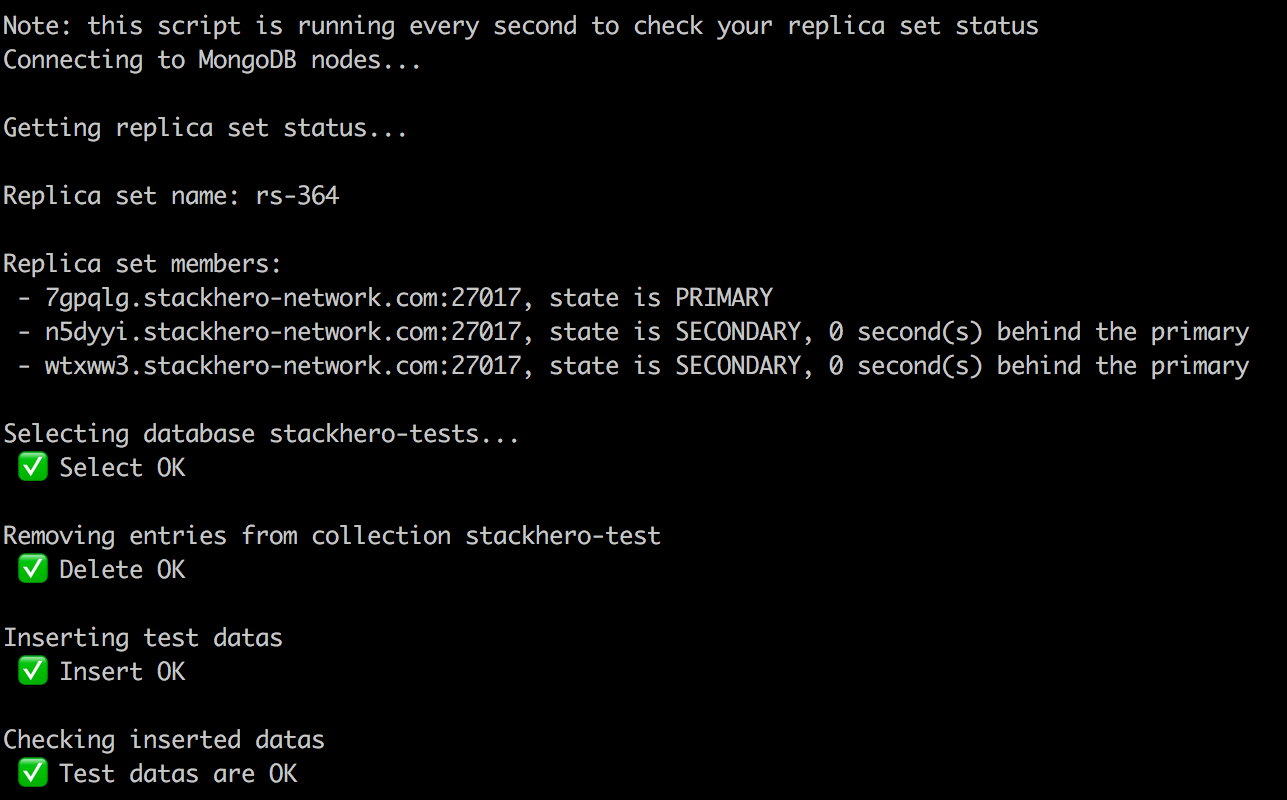 Screenshot of the script
Troubleshooting
Handling the error: "network error while attempting to run command 'isMaster' on host"
If you see this error, it is usually because TLS encryption has not been enabled. You can resolve this by adding the tls=true flag to your connection URL. For example:
mongodb://admin:PASSWORD@<XXXXXX>.stackhero-network.com:27017/admin?tls=true